Bedroom curtains are important for privacy, but they should also help create a peaceful atmosphere that inspires rest and relaxation. This was not the case in this city condo, so we removed the old curtains from the window and started from scratch to create beautiful window treatments without having to pull out a big sewing machine or a ton of equipment. These no-sew curtains can be made for any room of the house, and this technique can be used to make sheers, curtains or valances.

Because the home is located near other homes, a window covering offering plenty of privacy is a must. Natural light is also important to the homeowner, so we decided on a two layer window treatment with a textured sheer and a neutral, natural material for the curtain.
Supplies:
- Sheer fabric
- Curtain fabric
- Tape measure
- Scissors
- Fusible Web (¾” for regular and heavy fabric; ⅜” for lightweight fabric)
- Pins
- Iron
- Ironing board
- Curtain Rods (We used 2 tension rods since these curtains are nestled into the window frame)

Step 1: Choose your fabric and measure the appropriate length for your window and curtains. Add 5” on to the length you want your curtains to be. These curtains are 62” long when finished, so we cut the fabric to 67”. To make it easier, we left the fabric as wide as it originally came.

Step 2: Make a 1” fold on the long sides of your fabric and pin into place. Press fabric with your iron to make a definitive crease; remove the pins.


Step 3: Pick up hem fold and insert a line of fusible web in the crease. Trim the fusible web to the edge of the fabric, and fold the hem over the top.

Step 4: Use a dry iron to press the seam, sealing the hem and creating a nice, clean edge.


Step 5: Repeat Steps 2-4 on the bottom of your curtain. You don’t have to make an angled corner, but it does make a nice, clean look to the bottom corners of your curtains.

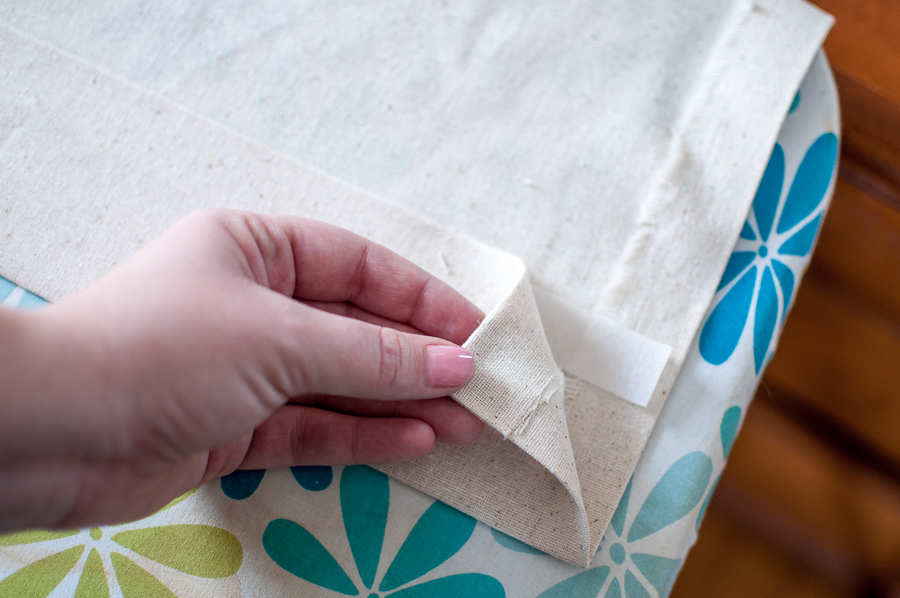
To make your corners, press a corner fold into the fabric, then add a triangle shaped piece of webbing under the corner flap and iron it into place. Do this on both bottom corners.


Then, cut the fusible web on an angle and measure a strip across the bottom, just as you did on the other sides. Iron the webbing into the crease to create a hem, as before.


Step 6: To make the top of the curtain, where the rod will go, make your 1 inch hem as before. Then, repeat the process with a 3” hem, placing the fusible web where the fabric meets, instead of in the crease. Iron the web into place. This creates a 2” pocket for your curtain rod.


You’re finished! One curtain panel is complete. Repeat the steps for your second curtain panel. Follow the same steps to create a sheer panel and put it on a separate curtain rod. Make sure to iron your curtains with lots of steam (and the Durathon iron has lots of steam!) before hanging them, so you don’t have any creases or wrinkles.


To hang the curtains, put up the sheer in the back and the curtain panels in the front, creating a layered look that allows the light to shine through.


great instructions! I am currently working on updating the curtains in my home.
This is the answer I’ve been looking for – Is it possible to use fusible tape to make the curtain rod pocket. My concern was that it wouldn’t be strong enough. Well, it’s been three years. How is the rod pocket holding up? It is pulling apart at the ends at all? Might it be a good idea to add a stitch at the end. I don’t mind adding a stitch here and there. I’m not getting out a sewing machine though.
Just followed these instructions to make curtains for my horse trailer dressing room windows. Very easy to follow instructions and the final product came out great! Thank you for providing this easy project with wonderful results!
It’s an excellent diy project.
Nice post and instructions too. Good to know about Sew Curtains Tutorial, as it resulted as luxurious style in home. Well done
Thank you for bringing such topic into light, I really loved the concept of your article. Thanks for sharing this information. It’s a great source of knowledge; I think it will be helpful for lot of people who are looking for learning more about diy no sew curtains tutorial.