 Cheryl Bush is the blogger and creator behind Sew Can Do. She’s a self-taught crafter, designer and mom of three living in Michigan. She created her blog to showcase her tutorials and DIY projects, and now creates patterns and designs for magazines, fabric companies and book publishers. You can find Cheryl in her online shop The Green Hedgehog or on Pinterest, Facebook and Twitter.
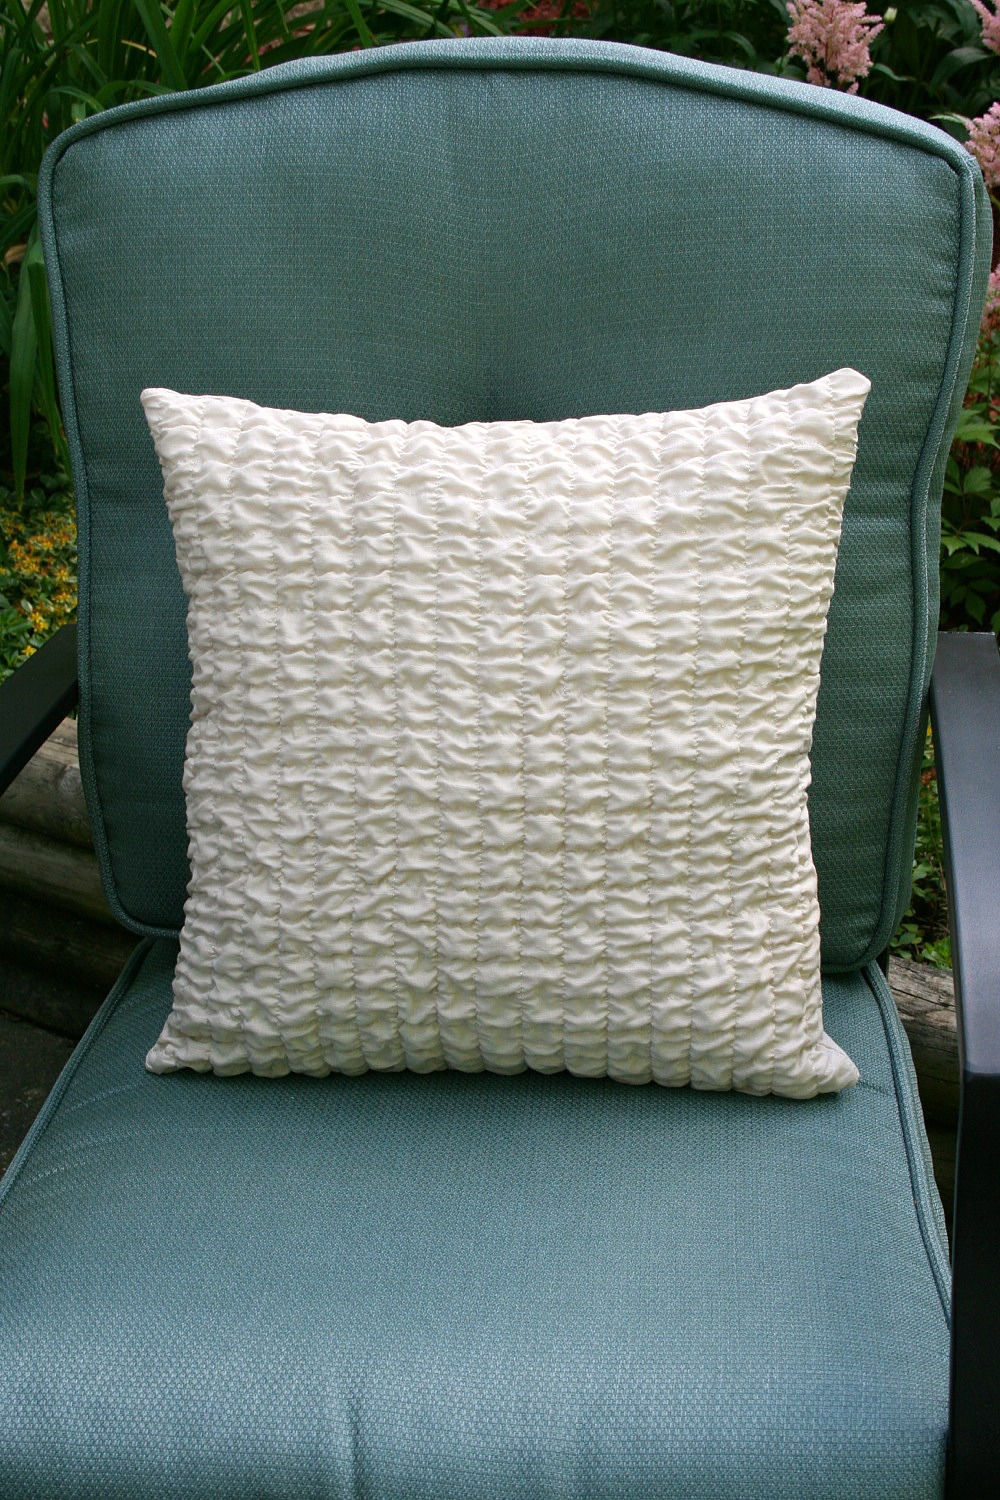
An easy and affordable way to update decor in any room is with attractive throw pillows. The best part is that a pillow with a high-end look can be sewn at home with minimal skills – and I’m here to show you how to do it. Making this designer-style textured pillow is simple with just a few key supplies and the help of a good, high-steam iron like the Durathon®.

Scroll down for a list of supplies you’ll need for this simple DIY project and a full step-by-step photo tutorial.
Supplies
- 1 yard fabric (cottons, knits or linen blends are ideal)
- Texture Magic shrinking fabric
- Metallic thread
- Yardstick
- Scissors or rotary cutter
- Disappearing marking pen
- Zipper and zipper presser foot
- Pins
- Iron
- Ironing board
- 16″ pillow form
To create the striking textured effect on the front of the pillow, I use a special polyester material called Texture Magic that shrinks when steamed. By sewing this to the back of the main fabric and then steaming it with a high-steam iron, it produces a beautiful crinkled look on the outer fabric.
Because of this, it’s important to select a fabric that is steam-friendly. Cottons, soft knits or linen blends are ideal and will texture well. One yard is enough for a standard 16″ square pillow. Using metallic thread for the topstitching will give extra eye-catching appeal.

Step 1
Begin by pressing main fabric to remove any wrinkles. Cut one square that is 17″ for the pillow back and another that is 22-½” for the pillow front. Cut a 22-½” square from the Texture Magic material. This piece and the front fabric are deliberately cut larger, as they will shrink up about 30%.

It’s alright if that material has some folds or wrinkles. They will be dealt with later when steaming, so don’t press them out.
Step 2
Put the Texture Magic against the wrong side of the main fabric and pin them together around the outer edge. Using a yardstick and disappearing marking pen, measure and mark 1″ vertical lines across the front of the fabric.

Step 3
Repeat with 1″ horizontal lines across the fabric so that there is now a marked grid. Pin every few inches to keep things together for stitching.

Step 4
Thread your sewing machine with the metallic thread. Using a stitch length of “3” and tension setting of “3”, begin stitching along each vertical line from top to bottom and then each horizontal line from side to side. Work slowly so the stitching will be nice and straight.

Step 5
Now it’s time for the fun part – the steaming! To get the lovely even shrinkage desired, the key is a high-steam iron like the Hamilton Beach® Durathon iron. Select the Linen setting, fill the iron to the max line with water, turn switch to “full steam” and give the iron 2 minutes to fully heat. With the back side of the fabric up, begin steaming just ½” away from the surface. Work slowly so the polyester has enough time to shrink and be careful not to touch it with the iron to avoid melting the fabric.


Step 6
Flip so the right side of the fabric is facing up and continue to steam. Once fabric is evenly crinkled, and will not shrink up any further, the steaming is done. Set aside.

Step 7
Take the 17″ fabric piece, face up, and place zipper face down on fabric with one side of the zipper tape along top edge of fabric and pin together. Using a zipper foot, stitch along zipper edge with a ½” seam allowance.

Step 8
Press seam open with the fabric away from zipper. Place this piece right side facing down on top of the textured front piece, lining up the remaining zipper tape edge. Pin fabrics together. Lay the yardstick along the raw edge of the back piece and trim off any excess from the textured piece so both pieces are exactly the same. Pin along the raw edges.


Step 9
Stitch along sides and bottom with a ½” seam allowance. Trim close to seam and turn right side out. Insert a 16″ square pillow form and zip closed.


You’re finished!
Decorate your favorite chair with your new DIY throw pillow and you’re all finished. Or make another one and have a matching set!


Comments