

 Bethany DeVore studied interior design in college and is now focusing her efforts on blogging, creating, and soaking up the joys of toddlerhood. She and her husband recently bought a new home and are working to turn it into their dream home one project at a time. Her blog, Dwellings By DeVore focuses on attainable DIY projects and design inspiration that will fit any budget.
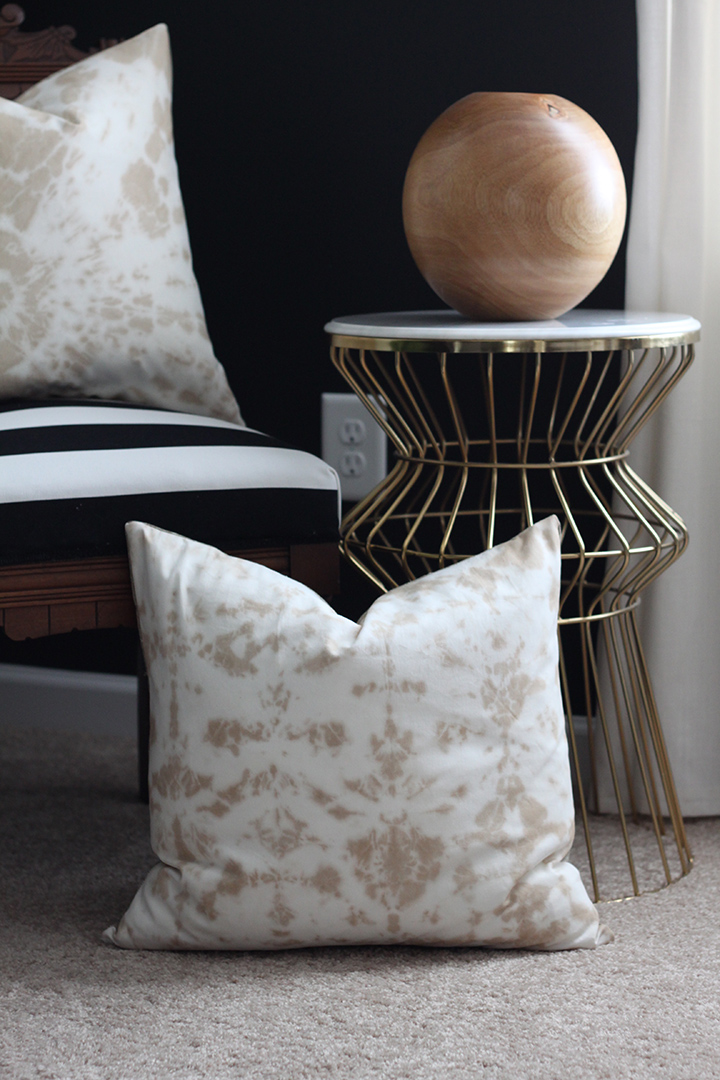
Tie dying is such a fun and unique way to create one of a kind fabrics for your home. The pattern and color combinations are endless. I’ve made my fair share of colorful tie dye projects in the past, but this time around I wanted to try something a little more muted to fit better with my current home decor. So I decided to use coffee! The coffee gives a nice earthy color that feels much more sophisticated than traditional primary colors. In fact, I loved the patterns so much that I decided to make them into pillows for my home.
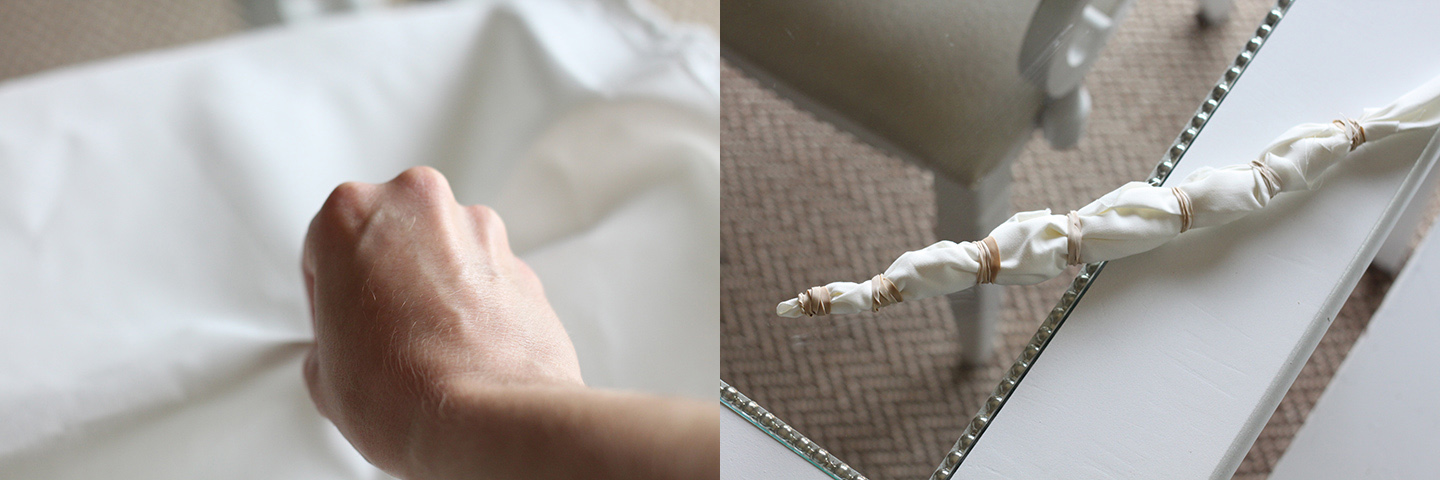
Then decide on the pattern you want to create with the tie dye. I chose to do two different patterns. The first is a very typical pattern that we’ve all probably done at some point, the bullseye. Start by pinching up the fabric wherever you want your bullseye to be and secure it with a rubber band. Then add additional rubber bands all the way down the fabric.
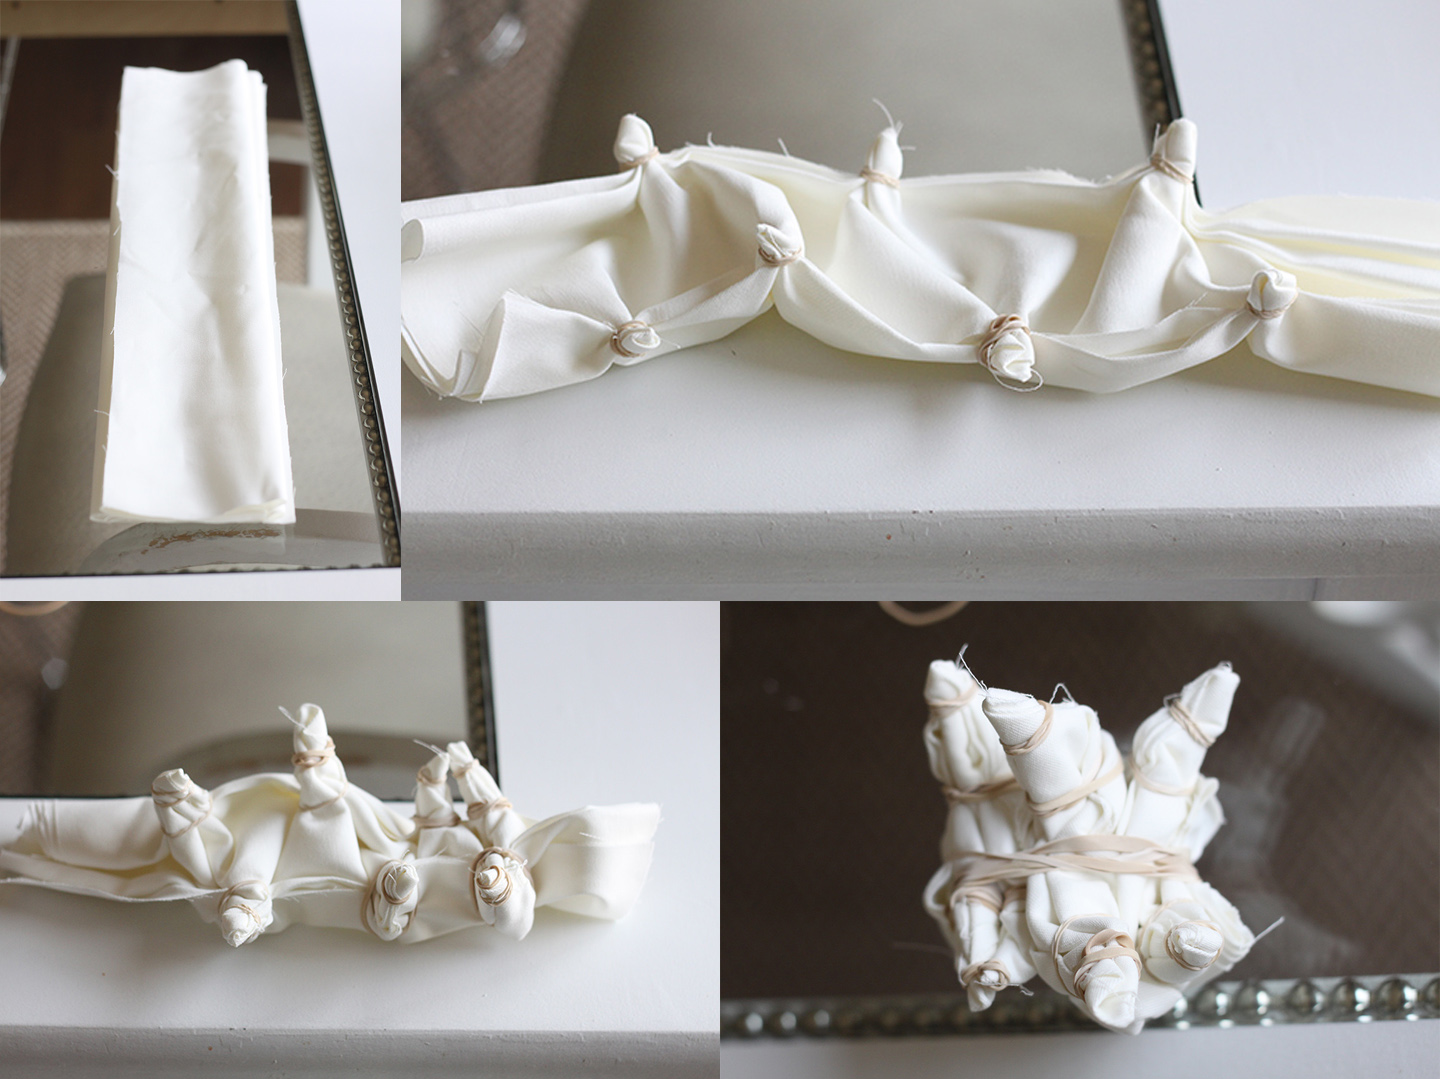
The other pattern is a shibori technique. Start by folding your fabric accordion style. Pinch and bind the fabric in small sections on one side and then do the same to the other side. Repeat this process again until you can no longer bind the fabric anymore. Then bind the middle section with rubber bands.

Fill a squirt bottle with the cooled coffee (an empty dish soap bottle works perfect for this). Squirt the coffee on your fabric being careful not to apply too much to the bound areas. You don’t want the coffee to get under the rubber bands.
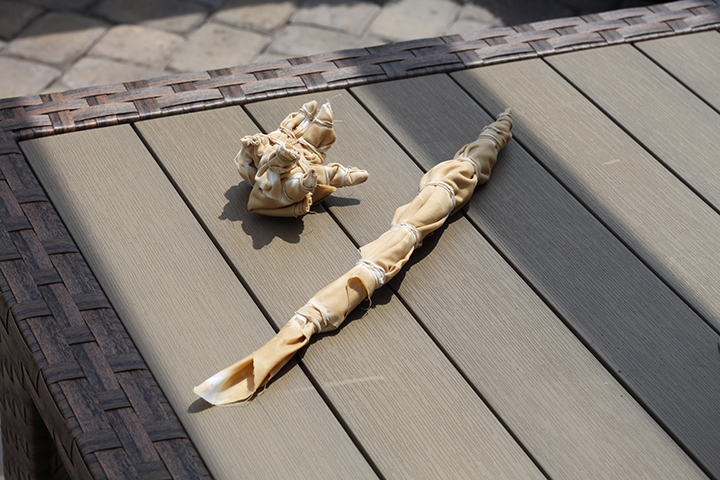
Allow the fabric to dry completely in the sun before you remove the rubber bands.
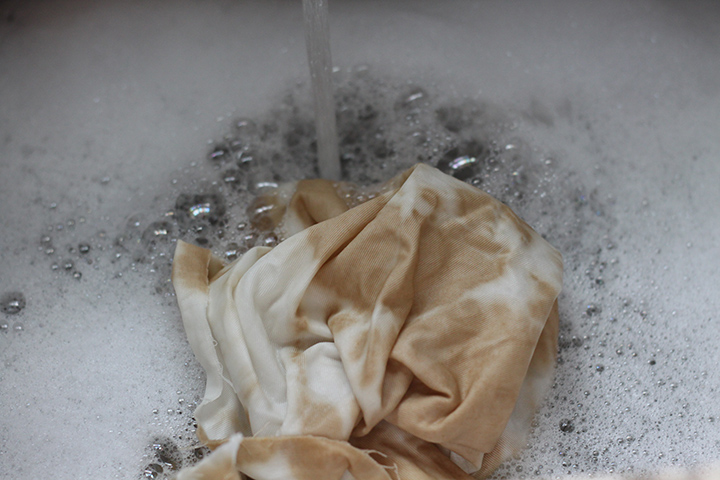
After the fabric is dry, remove the rubber bands and wash it in soapy water to remove the excess coffee and odor. Allow the fabric to dry again.

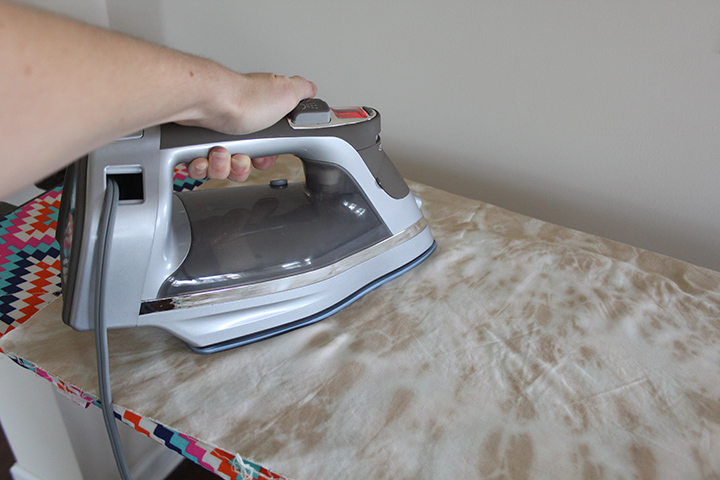
Iron the fabric to remove any wrinkles.

Now it’s time to turn these unique designs into pillows! You can either use a tie dye pattern for both sides of the pillows or go with a contrasting fabric for the back. I chose to use a taupe fabric with more texture for the back to provide a little more contrast. Make sure the front and back are the same size.
I love adding zippers to all my pillows because it makes the finished product feel more professional and only requires a few extra steps. To install the zipper, place the two pieces of fabric together with the right sides facing each other. Then sew a 3/4 seam along the bottom edge.
Press the seam open
Pin the zipper face down along the pressed seam. Use straight pins to secure the zipper in place.

Attach a zipper foot to your sewing machine and sew all the way around the zipper. You don’t necessarily have to have a zipper foot, but it will make this step much easier.

Turn the fabric over and use a seam ripper to open the first seam you sewed. Start where the zipper begins and stop where the zipper ends.

Open your zipper about halfway. This step is very important! If you don’t open the zipper, you won’t be able to turn the pillow right side out when you are done.

Place the right sides of the fabric together again and pin all the way around the edges.
Sew the remaining three sides of the fabric together leaving about 1/2″ seam allowance around the outer edge. Turn the pillow right side out and press everything to remove all the wrinkles.

Insert a pillow form and you have some really unique pillows! I think these would make great gifts, especially for someone who is a coffee lover! And you don’t just have to stick with pillows, a t-shirt would be perfect for this too!

Love this idea and can’t wait to do this myself. Have the white fabric waiting and if the tie-dye turns out well I plan to use the idea to sew up a cotton blouse.