


Marni Weaver is the creator of Haberdashery Fun and a self proclaimed sewing nerd. She loves figuring out how something was sewn together and anything to do with zippers or buttons. After traveling extensively to study fashion design, intern at Zac Posen and explore Westminster, she and her family have settled in sunny California – much to the surprise of this winter-loving Canadian. Marni can be found hidden under stacks of toddler sewing patterns or on Twitter, Pinterest, Instagram and Facebook.

I’m addicted to bright colors and I have wanted to make color-blocked pillows forever! By sewing your own pillows and home decor items, you can transform any room with on-trend colors in a very affordable way.
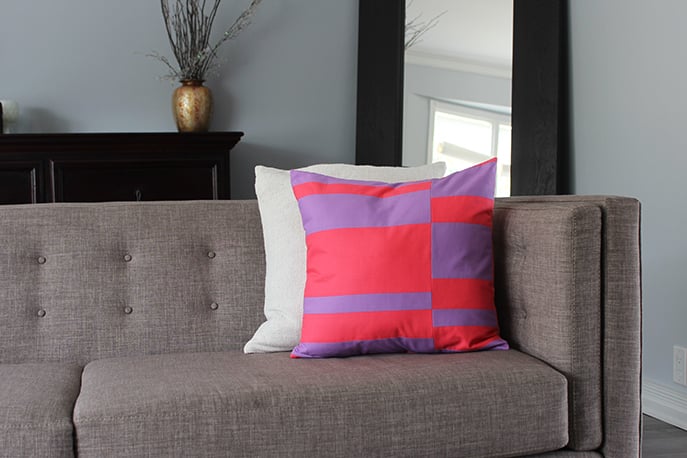
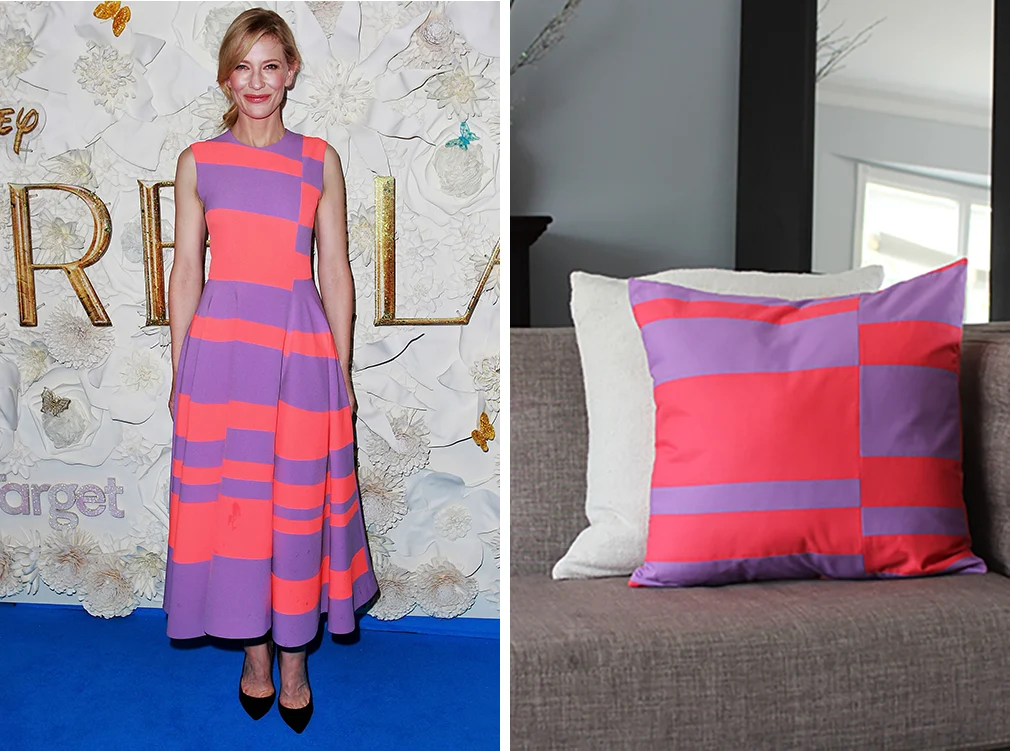
This pillow was inspired by the Roksanda Ilincic dress that Cate Blanchett wore at the Australian movie premiere of Cinderella. Have you seen this dress? Hello color. Not only are the colors in this dress bold and modern, but they almost vibrate and bounce off her dress. Once I saw this dress I knew that the color combination would make it into one of my projects.
 Source:
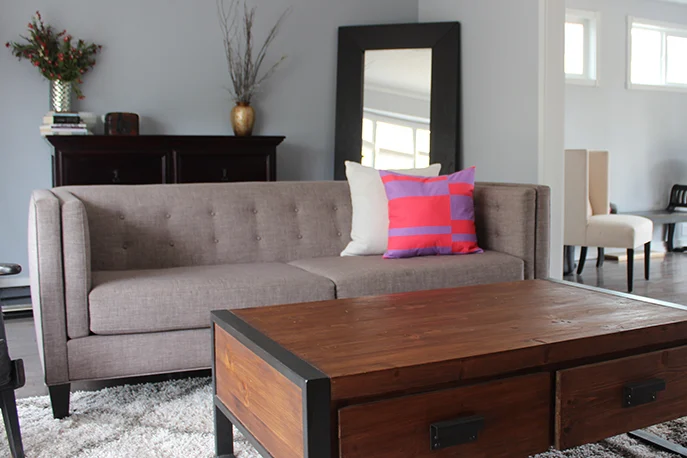
This is a simple envelope pillow. Envelope pillows are the easiest pillow to construct and can be made in a few short hours. The front is made from strips of fabric and the back is just 2 overlapping pieces of fabric. That’s it!

Pressing is an important feature in all sewing projects. With the help of a good iron, I believe you can press for success. A great teacher once told me, you can’t press quality into a garment or item at the END of the line. Quality is created as you press ALONG the way.
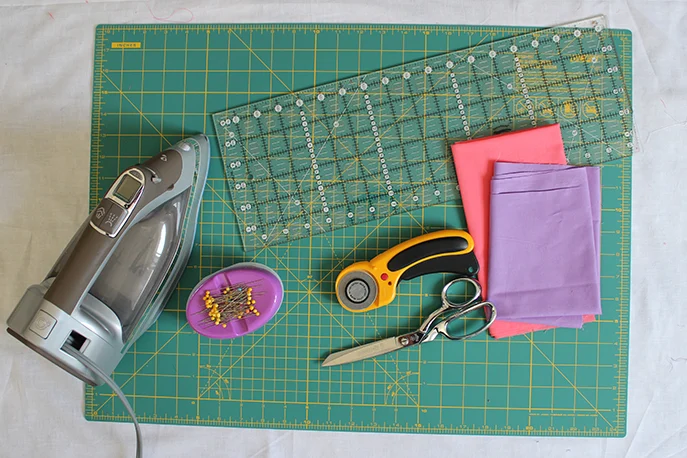
Supplies
- Solid fabric, 2 colors, 1 yard each (For this project, I chose the colors lilac and lipstick from Michael Miller.)
- Lining fabric, 1 yard
- Rotary cutter or scissors
- Cutting mat
- Ruler
- Sewing supplies
- Sewing machine
- Durathon Iron
- Ironing board
- 18″ pillow form

Let’s get started
Step 1
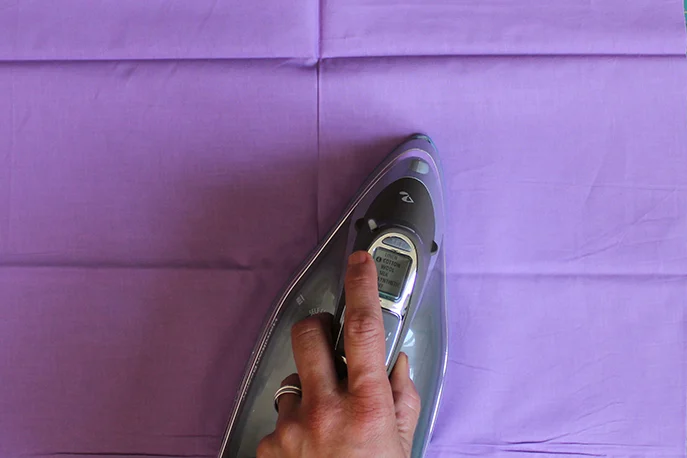
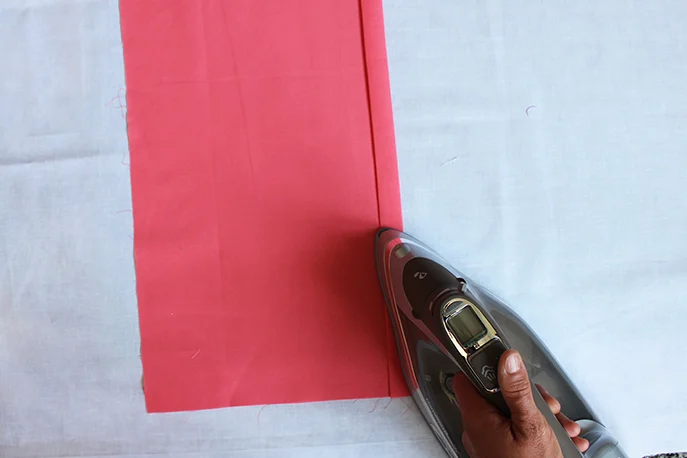
Press the fabric. Use the iron and press all wrinkles and fold lines out.
Step 2
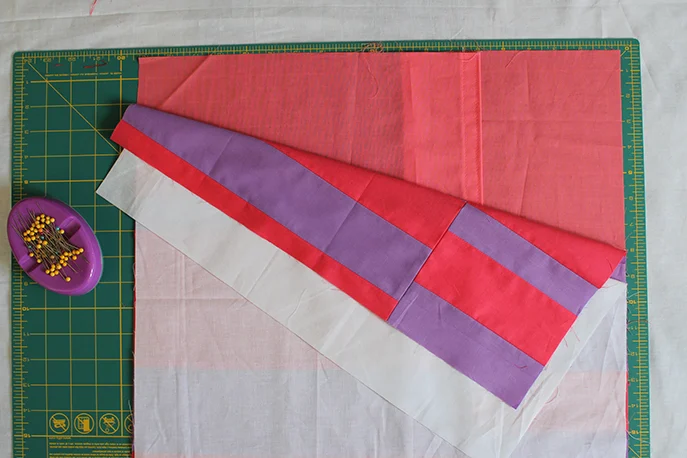
Lay one color of fabric onto the work surface. Cut strips of varying widths from 2″ through to 6″. The amount of strips cut will depend on the fabric width, but cut enough strips to sew together and have 2 panel 19″ long. Cut a strip 6″ wide and another strip that is 5″ wide. While you are cutting your fabric, also cut a 19″ x 19″ square from your lining fabric. For the back, cut 2 rectangles that are 16″ x 19 and 8″ x 19″. Cut the back from one of your front fabrics.

Step 3
Lay the strips out onto the work surface and figure out the design scheme. Use the dress as inspiration or lay out the strips in a random fashion.

Step 4
With right sides together, place 2 strips on top of each other. Pin if needed. Place into your sewing machine and sew together with a 1/4″ seam allowance.
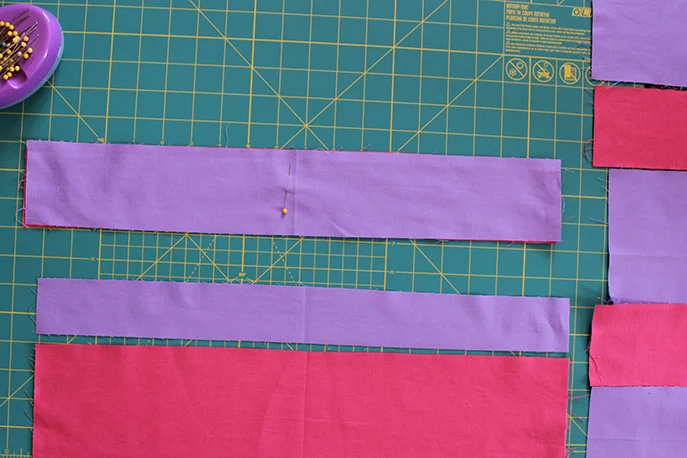
Step 5
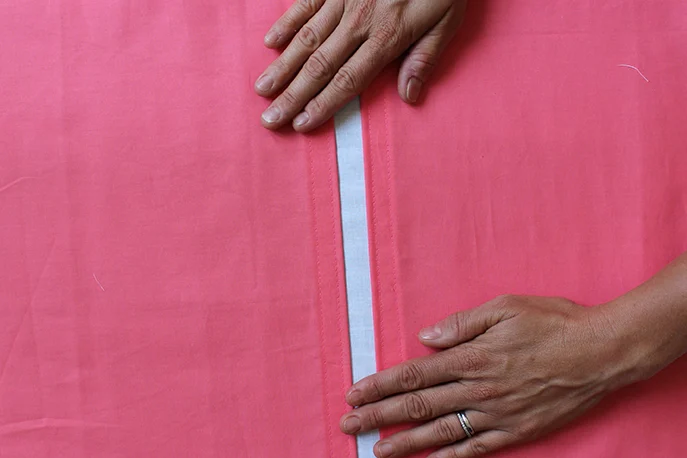
Press with your iron. First press with the seams closed, then open the seam allowance and press again.
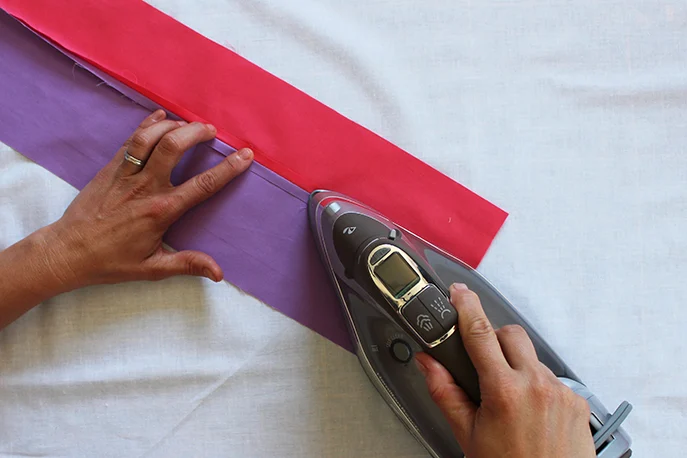
Turn right side facing up and give one last press. Make sure to lift the iron and then press. Repeat and another sew 2 strips together. Continue sewing pieces together until there is a panel 19″ or longer in length. Repeat and sew the other set of strips together to make a second 19″ panel.

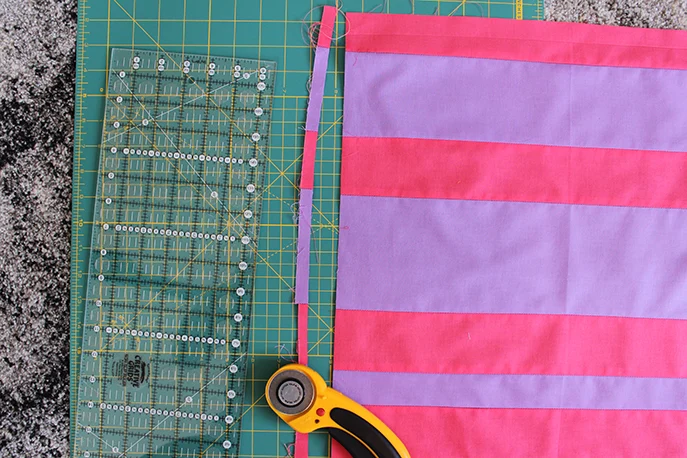
Step 6
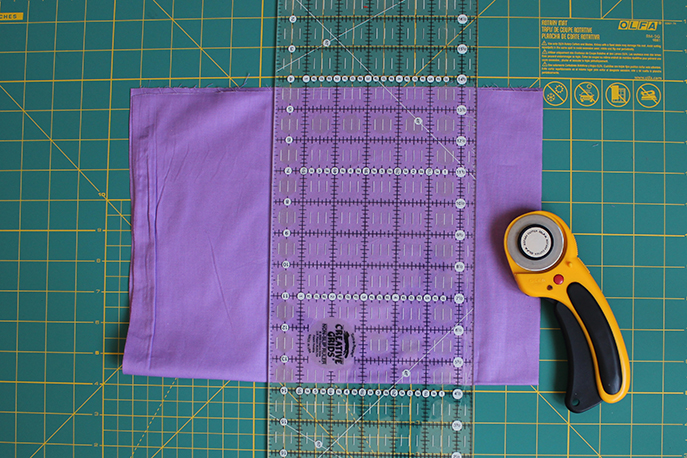
Lay the panels onto your work surface. Trim the edge so you can sew the 2 panels together. Repeat and trim the second edge.
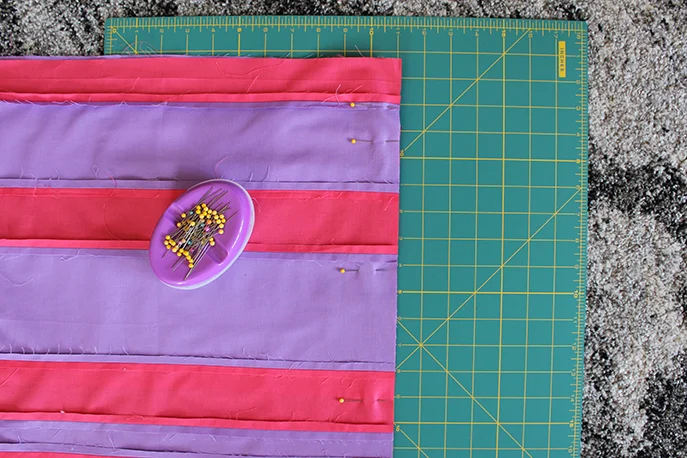
Step 7
Place right sides together and pin along the edge. Note – place the 2 edges together that were just trimmed. Place into your sewing machine and sew together with a 1/4″ seam allowance. This creates the offset center seam.
Step 8
Decide on the overall design scheme and cut the panel down to 19″ x 19″. This becomes the front.
Step 9
Place the back 2 rectangle pieces onto your work surface. Along the 19″ side, turn and fold the edge under 1/2″ and press with the iron. Repeat and turn and fold again. Pin.
Place into your sewing machine and edgestitch along both sides. Repeat for the other side. These 2 pieces create the “envelope back”.
Step 10
Sandwich the pillow pieces onto the work surface. Lay the back 2 pieces right side facing up with a 3″ overlap. Next lay the front pillow piece, right side facing down. Lastly lay the lining piece. Pin along the outside edge. Place into your sewing machines and stitch together with a 1/2″ seam allowance.
Step 11
Press the seams with your iron. Trim each corner.

Step 12
Turn right side out.
Step 13
Place the pillow form inside. Wiggle the corners into place.

That’s it. Once you’ve mastered the technique, think of all the fun you can have making pillows and decorating your home.

Comments