

A big elbow bump to all of you who are pulling out your stacks of fabric scraps to sew face masks for those who need them. While they are not a substitute for personal protective equipment, social distancing and staying home, they can certainly provide an extra barrier, or at the very least, a reminder not to touch our faces.
The CDC now recommends wearing cloth face coverings or masks in public settings where other social distancing methods are difficult to maintain. Please visit the CDC website on the proper use of homemade masks and guidance for protecting oneself.
My cousin Kathy’s daughter, a single mom with a 3-year old, recently began chemo treatments for breast cancer in Los Angeles. Kathy recently posted a request on social media for masks that her daughter, Kris, can wear during her treatments. I can sew, and quickly volunteered to make her some masks.
To make sure I hadn’t gotten in over my head, the first thing I did was a search for DIY video tutorials. I found a good roundup of videos on JOANN Fabric and Craft Store’s website and I chose this How to Sew a Medical Face Mask tutorial video by Erica Arndt, Confessions of a Home Schooler. Thank you Erica!
As Erica notes: These masks can be used by someone who is sick to help reduce the spread of disease via coughs or sneezes. They will NOT prevent anyone from catching a respiratory illness. Medical staff may use them over the top of medical-grade personal protection equipment as the masks are reusable if sanitized properly.
*** Masks are re-usable and should be sanitized or washed after each use! ***
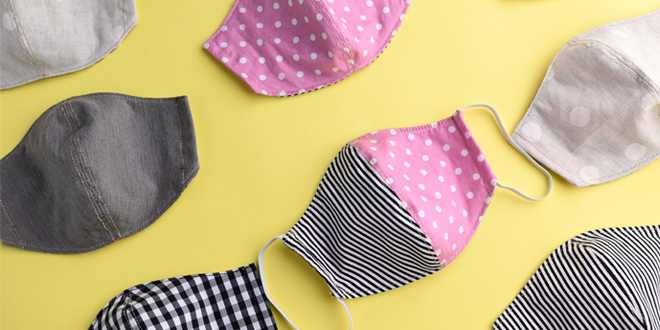
Here’s how my masks turned out:
 From a selection of tightly-woven fabric options, I chose fabrics with patterns that I thought would give an extra boost to Kris’ spirits — Supergirl, a cheetah print, and a fun tropical print for starters — then I added a plain color on the back. It’s important to make each side a different color to help people remember which side faces out if taking off and on. For the middle layer, I used white fabric that I had on hand.
After making the first test, I decided to add a wire across the top to help give shape around the nose. To do that, I simply zigzag-stitched over a pipe cleaner across the top of the middle layer and then left it in the seam allowance when I sewed the other pieces together.
 Pressing pleats in the sewn rectangle, using a hot iron with a lot of steam, finishes the mask.
After making six of these, I ran out of ¼-inch elastic I had in my stash. The ½-inch size will work, but it is not as comfortable around the ears. I might try elastic headbands or jewelry making cord as a substitute. Erica also suggests trying ribbon or fabric ties 18”-20” in length.
This is an easy project! It’s a worthwhile way to use up leftover fabric and a great way to help out your friends and family. You can even contact your local health facilities to see if they are in need of donations.
Since making these for Kris, the CDC guidelines for use have expanded to anyone who will be out in public. So, I decided to do a little more research and found many creative ways to make face masks at home, like this easy tutorial that walks through the Olson mask (center seam) pattern. If you do not have a sewing machine, I found this Emergency face masks – 5 easy, quick, no-sew ideas video that showcases a few different styles to try.
What style of mask have you created for yourself, friends, and family? Share your images on our Facebook page or describe the steps you took in the comments section below.
Comments