

When it comes to a homemade pie, what’s on the outside matters just as much as what’s on the inside. A perfectly golden homemade pie crust sets the stage for the whole dessert. Here are some expert tips from our Test Kitchen for each step—or should we say piece—of the pie process.
Mixing
Mixing is the most important step of preparing a pie crust. For a flaky crust, use very cold butter or shortening and do not over mix. The warmer your butter or shortening, the tougher and less flaky your crust will turn out. Be sure to keep your butter chilled (you can even freeze it for 10 minutes) while you are working with your dry ingredients. You should still see small pieces— even up to the size of a small marble— in your dough when you are done. Turn the dough out onto the counter and fold it over on itself 3 to 4 times, then form the dough into a disc, wrap it in plastic wrap, and put it in the refrigerator for 30 minutes to firm up the fats in the dough.
 A food processor can help you mix to perfection without a lot of guess work. Start with very cold butter and dry ingredients. Pulse just until the butter is cut into the flour mixture to about the size of large peas. Add ice water and process just until the dough comes together into a ball. Our Test Kitchen has perfected a deliciously flakey Food Processor Pie Crust that is as tasty as it is easy.
Rolling
Dust up your pin with some flour and roll from center out in all four directions to keep it even. To achieve a consistently even thickness, you can use store-bought elastic rings that slide onto the ends of your pin to keep it evenly spaced above the dough. These rolling pin “bumpers” prevent you from rolling the dough any thinner than the thickness of the band ensuring your pie crust is the same thickness across the dough.
Once it’s rolled out, gently fold the pastry over the rolling pin and carefully transfer it to the pie pan. Avoid stretching the dough as this can cause the crust to shrink when baked.
Choose a glass pan or an aluminum one with a dull finish. Never use a shiny pan as these deflect heat and can result in a soggy bottom crust.
Pre-baking
Why would you want to prebake (or blind bake as it’s sometimes called) your pie crust? There are two times it’s essential to blind bake: when you’re making a custard pie or when the pie filling is not going to be baked. Custard pies are so moist that the crust could get soggy before the pie has time to fully bake. By blind baking (or half baking) the crust first, you’re making sure the crust stays nice and firm. For pies where the filling won’t get cooked (like a French Silk Pie) you need to pre-bake the crust since you won’t bake the whole pie.
If you’re pre-baking, prick the bottom and sides of the crust with a fork (also called “docking”) to prevent your crust from bubbling up during baking. These tiny holes allow steam to escape, preventing the crust from puffing up. Alternatively, you can line the uncooked crust with parchment paper or foil and fill with pie weights to hold it down. If you don’t have pie weights at home and want to try out this method, you can also use uncooked rice or dried beans in a pinch. The added benefit of using pie weights is it gives added support to the sides of your crust so there’s less risk of sagging before you add the filling.
Protect the Edges from Burning with a Pie Shield
You can purchase a premade pie shield, or make this easy, homemade version to ensure those precise crimps or beautifully twisted edges turn out golden brown.
Make the Shield
• Cut a large piece of foil in a square that is big enough to cover the entire pie.
• Fold the aluminum foil in half, and then fold into quarters.
• Cut the outer open sides of the foil into a rounded corner.
• Then cut the center, following the same curve, until you have about two inches of foil remaining.
Place it around the pie
Carefully unfold the foil and lay it over the pie, positioning it so the foil circle covers the outer edge of the crust. Lightly crimp the edges, so the foil doesn’t slide off.
Bake
Bake the pie as you normally would. When there are 20 minutes left in the baking process, carefully remove the foil and place the pie back in the oven for the remainder of the cooking time.
For more helpful tips for protecting your pie crust from burning, follow this detailed step by step article.
Make-Ahead Pie Crust
 You can prep your pie crust weeks in advance and freeze it in several ways:
• As a ball of dough or rolled out into flat disks.
• Shaped into a pie pan and placed in a freezer bag. Use disposable foil pans so you don’t tie up your pan for months.
• As a whole, unbaked pie. This is suitable for fruit pies only. Thaw overnight and bake the next day.
Decorating Your Crust
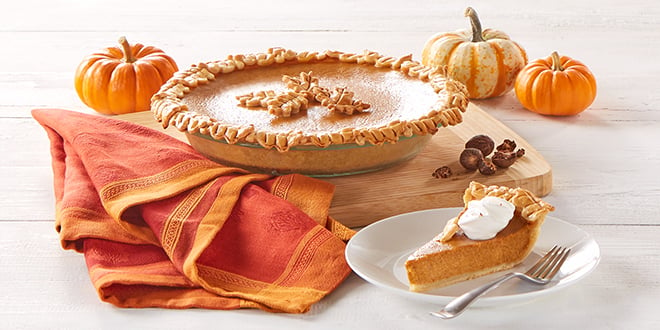
If you want to add a little extra decoration to your pie beyond a basic crimped crust, you can use crust cutouts. So simple to make, crust cutouts are a great way to incorporate seasonal decorations into your finished pie presentation. Just roll your dough to 1/16-inch thickness, use 1” to 2” cookie cutters to create your favorite shapes and arrange on a cookie sheet. Bake at 425°F until lightly browned, 8 to 10 minutes. Remove the crust pieces from the cookie sheet, let them cool completely, and dress up your cooked pie with these easy to make pie crust decorations.
Have left over dough? Try turning it into our ever so simple Cinnamon Sugar Pie Crust Chips and pairing it with your favorite dessert dip, like our Caramel Apple Dip.
Comments