

View and share our entire Vintage Durathon Cards collection.
In a study conducted by Hamilton Beach, it was revealed that nearly 95% of those surveyed know how to iron, and nearly 52% would iron a shirt if it were wrinkled. Only 15.3% never iron at all!
The tips, advice, and how-to steps here will help make the ironing process more efficient, saving you time to tackle some of your other favorite household chores.
Pressing On: Getting Started
- Unless you already have it set up to impress your family and friends or you’re just using it as a table, set up the ironing board. To avoid muscle strain, make sure it’s at a comfortable height, preferably hip level. To help pass the time and catch up on the news, set up the ironing board in front of the television.
- Always check the fabric content before beginning to iron. If the fabric is a blend, use the lower temperature setting. If the fabric content is unknown, use the lowest temperature setting and test first on an inside seam of the garment.
- If ironing several items, sort them by temperature and start by ironing the items that need the lowest temperature setting first. Tip: an iron heats up much faster than it cools down.
- To make items easier to iron, spray them with water, and roll them up so the dampness becomes evenly distributed.
- The heart of ironing lies in the soleplate of the iron. To maintain the quality of the soleplate, never iron over zippers, pins, buttons, or anything metal. Also check for mineral deposits before every use – before you plug it in. These are notorious for leaving nasty brown crud marks on your clean crisp white shirt 10 minutes before your big interview! To avoid this embarrassing situation, wipe the soleplate with a wet cloth and dish detergent, and then wipe clean with a damp cloth. Never use abrasive cleaners.
- Use caution when ironing around plastic buttons and zippers as these may melt.
- To iron fabrics labeled “Dry Clean Only,” first clean as directed before ironing. Use caution then begin ironing on the lowest setting, testing on an inside seam allowance of the garment.
- Build up those biceps by ironing lengthwise. Never iron in a circular motion as this can stretch the material.
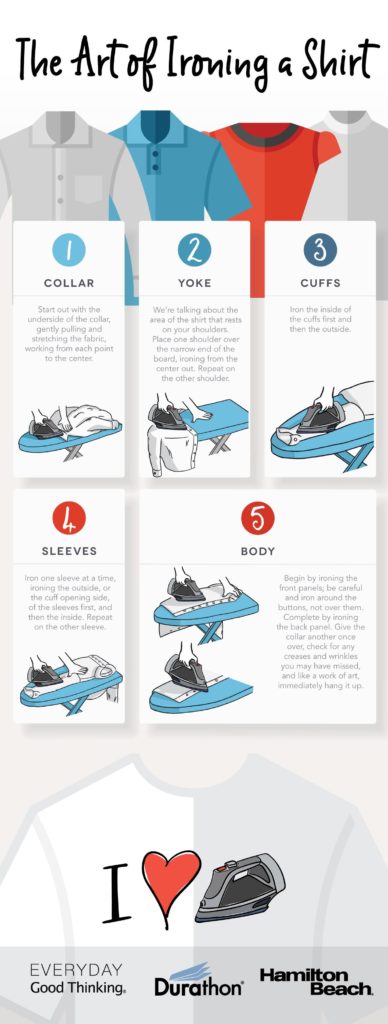
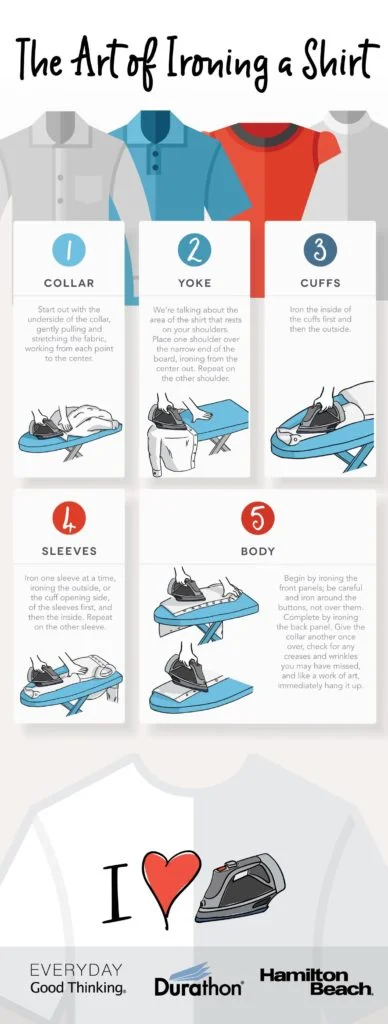
The Art of Ironing a Shirt
- Collar. Start out with the underside of the collar, gently pulling and stretching the fabric, working from each point to the center.
- Yoke. We’re talking about the area of the shirt that rests on your shoulders. Place one shoulder over the narrow end of the board, ironing from the center out. Repeat on the other shoulder.
- Cuffs. Iron the inside of the cuffs first and then the outside.
- Sleeves. Iron one sleeve at a time, ironing the outside, or the cuff-opening side, of the sleeves first, and then the inside. Repeat on the other sleeve.
- Body. Begin by ironing the front panels; be careful and iron around the buttons, not over them. Complete by ironing the back panel. Give the collar another once over, check for any creases and wrinkles you may have missed, and like a work of art, immediately hang it up.
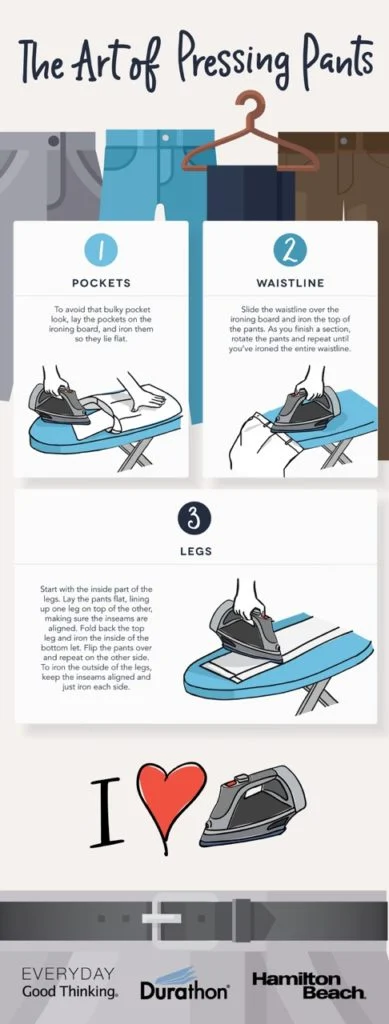
The Art of Pressing your Pants
- Pockets. To avoid that bulky pocket look, lay the pockets on the ironing board, and iron them so they lie flat.
- Waistline. Slide the waistline over the ironing board and iron the top of the pants. As you finish a section, rotate the pants and repeat until you’ve ironed the entire waistline.
- Legs. Start with the inside part of the legs. Lay the pants flat, lining up one leg on top of the other, making sure the inseams are aligned. Fold back the top leg and iron the inside of the bottom let. Flip the pants over and repeat on the other side. To iron the outside of the legs, keep the inseams aligned and just iron each side.
Comments